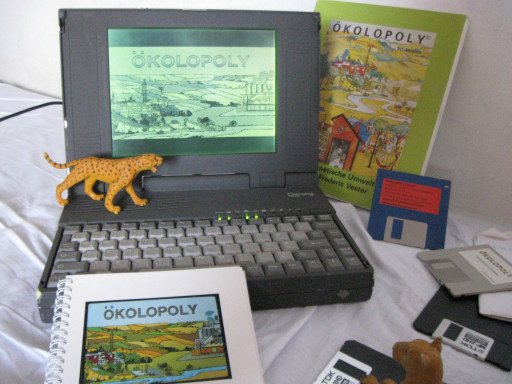
Chicony NB5620
About the laptop
There is very little known about this equipment; i got mine from
second hand, and including all what i digged out from the wast Internet,
the information materializing in the actual equipment (One laptop plus one
power supply unit) still weighted more. The information i list here is
either my own find, or collected from a few summaries (Mostly battery
selling sites).
Specifications
- CPU: Intel 3.86 at 20MHz (Turbo mode)
- Co.CPU: Optional
- RAM: 640Kb (1Mb?), expandable with additional 1Mb or 4Mb
- VGA: Cirrus Logic, 256Kb VRAM (Standard VGA)
- HDD: Conner 20Mb or 40Mb
- FDD: 1.44Mb 3.5"
- LCD: 640x480 pixel monochrome (gray)
- Keyboard: German layout, emulated numeric pad
- Mouse: None (One might be attached on the serial port)
- Sound: PC speaker
- Connectors: VGA, 1x LPT, 1x Serial, PS/2 for keyboard, 25 pin external FDD
- Power: 230V AC
- Battery: Who cares? (It has battery, but dead since long)
- Weight: Like a big lumpy brick
- Year: 1991
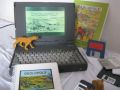
My particular unit was probably thrown out long before i got it due
to it's HDD failure. It had not got any expansion (So no coprocessor, and only
640Kb of RAM). Otherwise it works OK with a(n old) standard 110Mb laptop HDD.
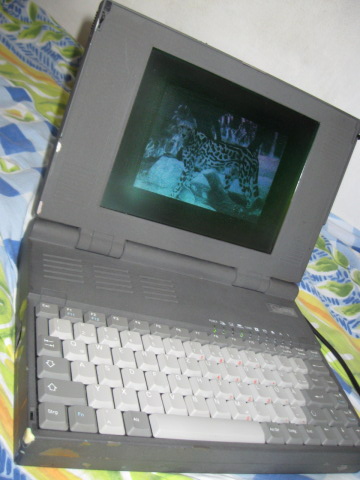
The LCD panel is a little dim and sometimes has stripes across it, probably
due to the early design.
Using the Fn keys
You will not likely see any manual for this laptop any more, so to
save you some time and nerves, here i list the most important Fn key
combinations (I figured these out myself as well). If the key has a blue
function printed on it, then holding the Fn key while pressing it will
activate that (Like the '+' and '-' symbols on the arrow keys). Most of the
keys however lack this information. Here are those keys:
- W - Width adjust LCD to 360 or 720px wide screen modes and back
- E - Expand height of 200 or 400px tall modes to fill the LCD or shrink
- R - Reverse display, black on white text
- A - Color (full grayscale on LCD) / monochrome (2 color) switch
- S - Sleep; turns off the LCD lowering power consumption
- F - Border color rotator, has effect when display does not fill the LCD
- C - Vertical position, has effect when display is less than 480px tall
- B - Bold text, loads a bold font in text modes, or reverts original
- ; - VRAM slide left (Just try it, i did not find much sense in this)
- : - VRAM slide right
- Pos1 - Display on LCD, no signal on VGA connector (default)
- Ende - Display on external VGA, no picture on LCD
Diassembling
Sometimes you may need to replace something (Like the HDD) under the
hood. So here i provide some details, and well, pictures, of what you will
find in there. Note that this procedure is not easy, it needs care and
patience, so it is not recommended if you have no previous experience working
with hardware.
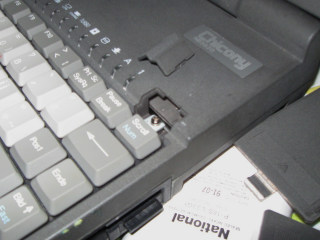
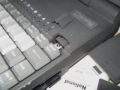
First of all you need to locate all the screws. To do it right even
before that you need to remove the keyboard unit. Two screws hold it in place
which are covered by small plastic pieces.
To remove the unit, you also need to unplug the wiring
from the underlying circuit board. Do not pull these with force, try to slowly
work them out from the connectors. Note that plugging them back might be a
little tricky! When the keyboard is loose, you can turn the box around, and
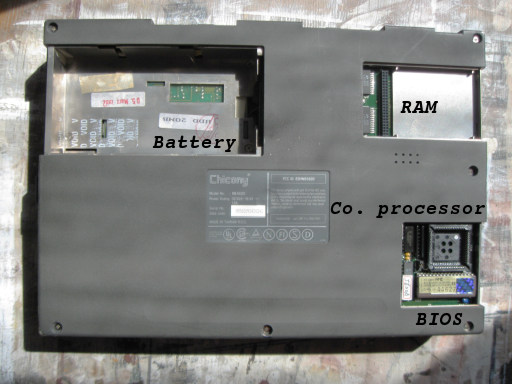
after removing the rubber foots, unscrew all screws
what you see including the three ones sitting under the battery. Those all fix
the top part of the housing.
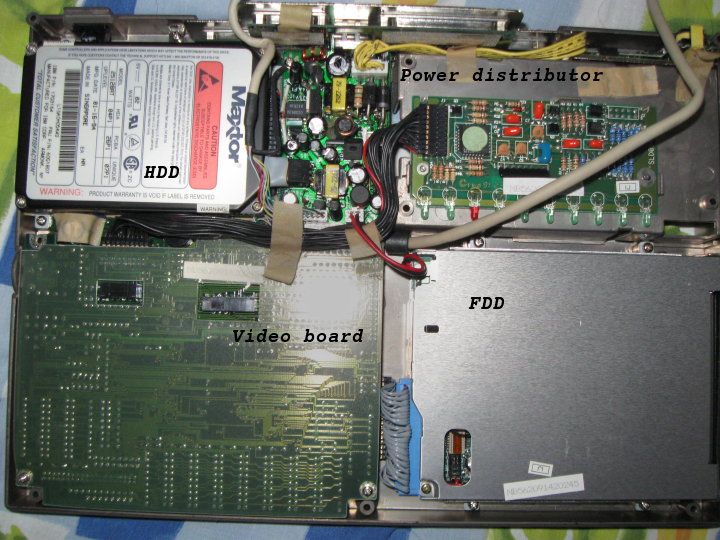
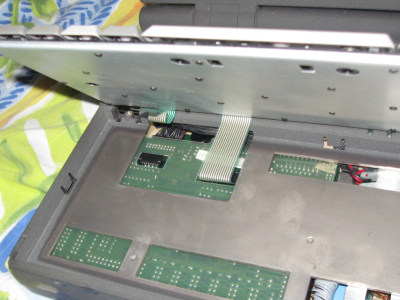
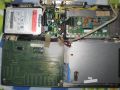
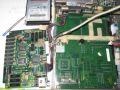
Now you should see a mess of wires and boards
sitting in the bottom of the cover. The two black connectors on the big green
board (The video board) were where the keyboard was plugged in. Also notice
the two white cables going to the LCD, and their initial placement - replacing
them to allow the cover shutting again is the trickiest part of the whole
assembly (You may help yourself with some glue tapes. Once for me it took more
than a half hour to get over this part).
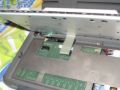
To get any further you will need to remove the power distributor unit
as it also covers the fourth screw fixing the hard disk, and it's connector.
Apart from the yellow "spaghetti" cable, you should disconnect everything from
it before (And the black cable pack going to the LED board as well). Two
screws hold it in place. After you had done with these, gently lift it from
the middle; note that a little force may be necessary. This unit is plugged in
two connectors on it's bottom. When replacing you need to be very (!) careful
to not bend or break those pins!
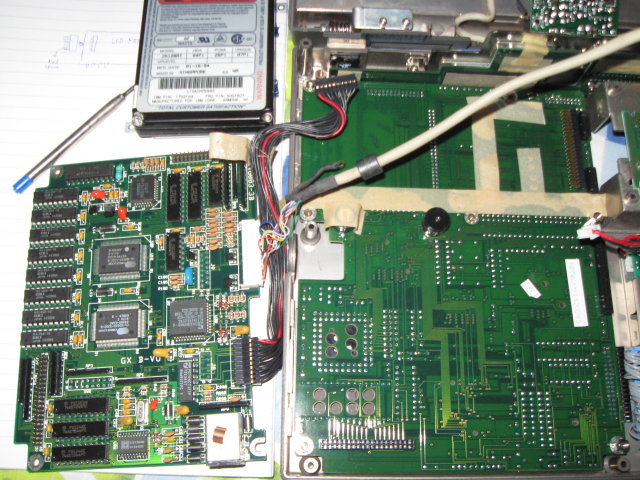
Now you can replace the hard disk if you want to do so. The notebook
should accept any old style laptop HDD at least up to a size of 110Mb (The
Maxtor one you see here is a 110Mb one). Note that you must determine the
appropriate BIOS settings for the HDD since it does not offer automatic
detection.
At this point if you want, you may even remove and check out the two
boards consisting the actual computer, but beforehands be sure to record your
HDD settings in the BIOS since it will forget if you seperate the two boards.
I can not help you this case as i do not know the specifications of the
original Conner HDDs. Alternatively you may try to reverse what you just did,
hope successing (If not, well, i am in the need of a RAM expansion unit, so as
you happen to have a defective laptop i won't ask much if i borrowed it, not?
:) ).


Warnings regarding usage
There are a few things you may need to pay attention to if you want
to longer the life of your old equipment. First the fact that it tends to get
a little hot during operation. Do not place it on heat - insulating material
for long (like what i did above for the photographs). The power supply unit is
even more prone to this, you might even want to keep it in some ventilated
place during operation. An other problematic part is the power supply
connector on the laptop's back. This part seems to be a little fraigle, and to
make things worse the power cord needs considerable force to plug in or out.
If possible, do not do these if it can be avoided (Or prepare to resolder
loosened contacts on the power distributor board... Or as i told, i really
need a RAM expansion unit :3 ). I store the laptop with it's power supply left
plugged in it (but of course not on the mains).
Programming speculations
The internal RAM's size
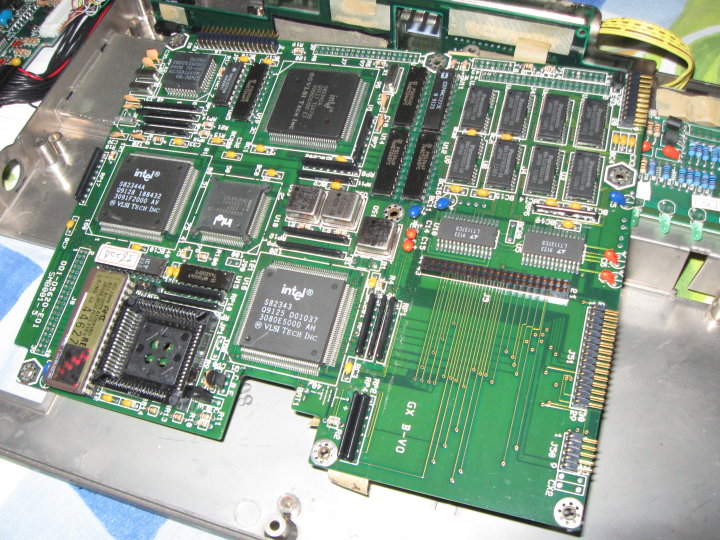
As it is certainly visible on the motherboard, the laptop contains
eight RAM chips soldered on it. This means that they should be of 128Kb
capacity each (All chips are the same), which sums up to a total of 1Mb. It
is still unclear how the 384Kb UMB area can be accessed: the BIOS does not
offer any feature enabling RAM there (Except for shadowing), and tries shown
that normally there are no writeable areas enabled above 640Kb (Except for
the video RAM, but that's an entirely different thing). UMBPCI and the few
other existing hardware UMB providers does not support this laptop.
Programming the Cirrus VGA
It was a nice find when browsing the Ralph Brown Interrupt List i
found functions relating to Cirrus video BIOSses. This includes a bunch of
references regarding the operation of LCD panels. It is very likely that
this laptop's VGA will also answer these calls, so it is programmable from
software (This mostly means it should be possible to access those functions
the Fn keys provide). This still needs verification though, but why wouldn't
it work?
It should be noted however that the LCD may or may not like tricky
VGA programming. I did not test as the least thing i want is damaging it. It
is fine if you keep the VGA standard timings (This means avoiding changes on
the Horizontal Total and Vertical Total registers only putting values there
matching to the standard 640/720px width and 400/480px height).